导图社区 Spring Boot思维导图
- 312
- 3
- 0
- 举报
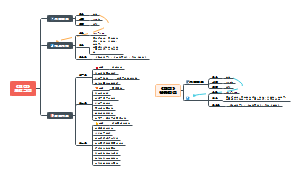
Spring Boot思维导图
Spring Boot思维导图,包括启动Spring容器方式、配置数据库资源、配置文件的拆分与整合等等。
编辑于2022-03-27 22:05:42- 配置数据库资源
- 相似推荐
- 大纲


Spring
启动Spring容器方式
@Configuration注解//表示启动Spring容器
@Configuration public class TestConfiguration { public TestConfiguration() { System.out.println("TestConfiguration容器启动初始化。。。"); } // @Bean注解注册bean,同时可以指定初始化和销毁方法 // @Bean(name="testBean",initMethod="start",destroyMethod="cleanUp") @Bean @Scope("prototype") public TestBean testBean() { return new TestBean(); } }
public class TestMain { public static void main(String[] args) { // @Configuration注解的spring容器加载方式,用AnnotationConfigApplicationContext替换ClassPathXmlApplicationContext ApplicationContext context = new AnnotationConfigApplicationContext(TestConfiguration.class); // 如果加载spring-context.xml文件: // ApplicationContext context = new // ClassPathXmlApplicationContext("spring-context.xml"); //获取bean TestBean tb = (TestBean) context.getBean("testBean"); tb.sayHello(); } }
xml方式
ApplicationContext ac = new ClassPathXmlApplicationContext("applicationContext.xml");
<?xml version="1.0" encoding="UTF-8"?> <beans xmlns="http://www.springframework.org/schema/beans" xmlns:xsi="http://www.w3.org/2001/XMLSchema-instance" xmlns:p="http://www.springframework.org/schema/p" xsi:schemaLocation="http://www.springframework.org/schema/beanshttp://www.springframework.org/schema/beans/spring-beans-4.1.xsd"> <bean id="book" class="com.bean.Book"></bean> </beans>
配置数据库资源
配置一个简单的数据库连接,常用于测试
<!-- 配置Spring提供的简单数据库配置对象到SpringIOC容器 --> <bean id="dataSource" class="org.springframework.jdbc.datasource.SimpleDriverDataSource"> <property name="driverClass" value="oracle.jdbc.OracleDriver"/> <property name="url" value="jdbc:oracle:thin:@127.0.0.1:1521:ORCL"/> <property name="username" value="scott"/> <property name="password" value="tiger"/> </bean>
配置第三方数据库连接池
<!-- 配置第三方的DBCP数据库连接池 --> <bean id="dataSource" class="org.apache.commons.dbcp.BasicDataSource"> <property name="driverClassName" value="oracle.jdbc.OracleDriver"/> <property name="url" value="jdbc:oracle:thin:@127.0.0.1:1521:ORCL"/> <property name="username" value="scott"/> <property name="password" value="tiger"/> <!-- 配置连接池的最大数据库连接数 --> <property name="maxActive" value="255"/> <!-- 配置连接池的最大等待连接中的数量 --> <property name="maxIdle" value="5"/> <!-- 配置连接池的最大等待时间(毫秒数) --> <property name="maxWait" value="10000"/> </bean>
配置文件的拆分与整合
拆分原因
项目规模变大,配置文件可读性、可维护性差 团队开发时,多人修改同一配置文件,易发生冲突
拆分策略
1、公用配置+每个软件模块一个单独配置文件(包含dao、service、action) 2、公用配置+DAO Bean配置+业务逻辑Bean配置+Action Bean配置
xml方式引入配置文件:import标签的resource属性
<!-- 包含外部的xml文件 --> <!-- resource="a.xml"指定文件的路径 --> <import resource="a.xml"/>
注解方式引入配置文件(@ImportResource)
@ImportResource({"calsspath:Spring10_4_自动转配Bean_注解方式 /applicationContext.xml"})
@ImportResource中配置的内容是一个数组,就是可以引入多个Spring的xml配置文件,这样就可以引入多个xml文件所定义的Bean了,Spring容器会将配置中的文件和扫描的POJO类一起注册到Spring IOC容器中,其他需要引用的地方直接获取就行了。
注解方式引入配置类
@Import({ApplicationConfig2.class,ApplicationConfig3.class}) public class ApplicationConfig{} @Import引入多个配置类,效果同上。
引入属性文件
注解方式引入属性文件(*.properties)
属性文件解析类:PropertySourcesPlaceholderConfigurer
Spring 中是没有解析属性占位符的能力,Spring 推荐使用一个属性文件解析类进行处理,它就是 PropertySourcesPlaceholderConfigurer,使用它就意味着允许Spring解析对应的属性文件,并通过占位符去引用对应的配置。
@Configuration//表示启动Spring容器 @ComponentScan(basePackages = {"com.ssm.chapterl0.annotation"}} //将ignoreResourceNotFound属性定义为true,Spring在找不到value={"classpath:jdbc.properties"}指定文件的时候不会抛出异常,停止工作 @PropertySource(value = ("classpath:database-config.properties"}, ignoreResourceNotFound=true) public class ApplicationConfig { @Bean public PropertySourcesPlaceholderConfigurer propertySourcesPlaceholderConfigurer () { return new PrppertySourcesPlaceholderConfigurer (); } } 上面的代码是向Spring IOC容器中注入了一个PrppertySourcesPlaceholderConfigurer 对象实例,它的作用是为了让Spring能够解析属性占位符。
xml方式引入属性文件(*.properties)
<context:property-placeholder ignore-resource-not-found="true" location="classpath:database-config.properties, jdbc.properties"/>
这里的ignore-resource-not-found属性代表着是否允许文件不存在,配置为true,则是允许不存在。当默认值为false 时,不允许文件不存在,如果不存在,Spring会抛出异常。属性location是一个配置属性文件路径的选项,它可以配置单个文件或者多个文件,多个文件之间要使用逗号分隔。如果系统中存在很多文件,那么属性location就要配置长长的字符串了,不过还有其他XML的方式也可以进行配置,按照下面这种方式进行配置,就可以配置多个属性文件,且可读性更高。
<bean class="org.springframework.beans.factory.config.PropertyPlaceholderConfigurer"> <!-- 字符串数组 ,可配置多个属性文件 --> <property name="locations"> <array> <value>classpath:database-config.properties</value> <value>classpath:log4j.properties</value> </array> </property> <property name="ignoreResourceNotFound" value="true" /> </bean> 在需要多个文件的场景下 , 这样的配置会更加清晰一些,当需要大量属性文件的时候使用它更好。
通过占位符获取,通过@Bean标签装配到Spring IOC容器中
通过占位符获取: @Component public class DataSourceBean { //注意这里加粗的代码,使用了占位符${driver}获取属性文件的值,当然是使用key去获取value的方式。 @Value("${driver}") private String driver = null; @Value("${url}") private String url = null; @Value("${username}") private String username = null; @Value("${password}") private String password = null; @Bean(name = "dataSource") public DataSource getDataSource() { Properties properties = new Properties(); properties.setProperty("driver", driver); properties.setProperty("url", url); properties.setProperty("username", username); properties.setProperty("password", password); javax.sql.DataSource dataSource = null; try { dataSource = BasicDataSourceFactory.createDataSource(properties); } catch (Exception e) { } return dataSource; } }
Spring AOP
@AspectJ注解方式
启用Spring AOP功能
注解方式:在工具类上添加@EnableAspectJAutoProxy注解
@Configuration @EnableAspectJAutoProxy @ComponentScan("com.ssm.chapterl1.aop") public class AopConfig {}
xml方式:在Spring配置文件中添加Spring AOP自动代理标签
<!-- 注解方式实现AOP第一步:启用Aspect框架的功能 --> <aop:aspectj-autoproxy/>
创建切面类:@Aspect//表示当前类为切面类
@Aspect//表示当前类为切面类 @Component//表示当前类的实例由Spring管理控制。 public class RoleAspect {}
定义通知类型
前置通知:@Before标签 解释说明:在动态代理反射原有对象方法或者执行环绕通知前执行的通知功能
@Before(value = "execution(public void Spring11_3_SpringAOP_注解方式.service.impl.RoleServiceImpl.printRole(..))&&args(role)", argNames = "role") public void before(Role role) {}
后置通知:@After标签 解释说明:在动态代理反射原有对象方法或者执行环绕通知后执行的通知功能。无论是否抛出异常,它都会被执行
@After("execution(public void Spring11_3_SpringAOP_注解方式.service.impl.RoleServiceImpl.printRole(..))") public void after() {
后置返回通知:@AfterReturning 解释说明:在动态代理反射原有对象方法或者执行环绕通知后执行的通知功能
@AfterReturning("execution(public void Spring11_3_SpringAOP_注解方式.service.impl.RoleServiceImpl.printRole(..))") public void afterReturning() {}
后置异常通知:@AfterThrowing 解释说明:在动态代理反射原有对象方法或者执行环绕通知产生异常后执行的通知功能。
@AfterThrowing("execution(public void Spring11_3_SpringAOP_注解方式.service.impl.RoleServiceImpl.printRole(..))") public void afterThrowing() {}
环绕通知:@Around 解释说明:在动态代理中,它可以取代当前被拦截对象的方法,通过参数或反射调用被拦截对象的方法
@Around(value = "execution(public void Spring11_3_SpringAOP_注解方式.service.impl.RoleServiceImpl.printRole(..))") public void around(ProceedingJoinPoint jPoint) { System.out.println("around before......"); try { jPoint.proceed();//回调至业务方法。 jPoint.proceed(参数数组);//传递参数数组 } catch (Throwable e) { e.printStackTrace(); } System.out.println("around after......"); }
定义切入点
定义通知(无参数):@Before(value = "execution(* Spring11_3_SpringAOP_注解方式.service.impl.RoleServiceImpl.printRole())") public void beforeParam() {}
定义通知(传递参数):@Before(value = "execution(* Spring11_3_SpringAOP_注解方式.service.impl.RoleServiceImpl.printRole(..))&&args(role, sort)", argNames="role, sort") public void beforeParam(Role role, Integer sort) {}
1,execution:代表执行方法的时候会触发,在执行指定的方法之前或之后会被该方法拦截,并先执行当前方法,再执行原来的方法,相当于拦截器功能。 2,*:代表任意返回类型的方法。 3,Spring11_3_SpringAOP_注解方式.service.impl.RoleServiceImpl:代表类的全限定名。 4,printRole:被拦截方法名称。 5,(..):任意的参数。 6,argNames指定参数名称列表
within属性:限定了execution定义的正则式下的包的匹配,从而达到了限制效果,这样Spring就只会拿到com.ssm.chapterl1.aop.service.impl包下面的类的printRole方法作为切点了
@Before ("execution(*.com.ssm.chapterll.*.*.*.*.printRole(..))&&within(com.ssm.chapterll.aop.service.impl.*)") public void before() {
@Pointcut注解:定义切入点对于各个通知类型往往是同一个切入点,避免切入点重复定义,使用@Pointcut注解一次定义,多处使用,调用处直接引用切入点所在的方法名称即可。 注意:不推荐方式,使用上面这种方式,@Pointcut标签定义切入点,其他位置引用,虽然可以取代多次定义的麻烦,但是在方法较多时,定义不明确容易出现问题,所以推荐每个方法上面都编写明确的定义。
@Pointcut("execution(public void Spring11_3_SpringAOP_注解方式.service.impl.RoleServiceImpl.printRole(..))") public void print() {} //注意。这里使用的@Pointcut声明切入点的方法名称,而不是切入点表达式中的方法名称。 @Before("print()") public void before(){ System.out.println("Before......"); }
也可将切入点定义为静态字段,需要的位置直接引用即可
//声明切点方式1 static+final public static final String EXP="execution(* *..*.*myDowork*(..))&& args(str,i)"; //声明切点方式1 @Before(value=EXP,argNames="str,i") public void before2(String str,Integer i) { System.out.println("123"); System.out.println(str+i); }
// 切面表达式整理: 1,public表示方法的修饰符,如果是模糊的类型,可以用*代替,例子:* void com.Bean.ClassA.insert*(..)。 2,void表示方法的返回值类型,如果是模糊的返回值类型修饰符,可以用*代替,例子:public * com.Bean.ClassA.insert*(),如果方法修饰符和返回值类型都想模糊,那么使用一个*代替,例子:* com.Bean.ClassA.insert*(..)。 3,com.Bean.ClassA表示需要被代理类的路径,如果是模糊的路径,可以用*代替,例子:com.Bean包下面的,例如:public void com.Bean.*.insert*(),com包下面的,例如:public void com..*Book(..),所有包下面的,例如:public void *.insert*()。 4,insert*(..)表示方法名和参数,如果方法名是完全模糊的,那么可以用*代替全部,如果方法名其中有部分模糊,可以用*代替模糊的部分,模糊的部分在前面中间后面都可以,例如:*Book(),insert*ok(),insert*(); 5,(..)表示参数,如果没有参数则是(),如果有一个参数,指定参数类型即可,例如(int),(String),多个参数就指定多个参数类型,例如:(String,int),如果参数类型模糊,可以用*代替,例如(String,*),如果后面的参数个数和类型都模糊,可以用..代替,例如(String,..),如果参数个数和类型全部模糊,参数列表只需要用..代替,例如(..)。
切入点功能增强):引入其他类的方法来得到更好的实现(来完善织面的功能)
注解方式:@DeclareParents注解
接口中: public interface RoleVerifier { public abstract boolean verify(Role role); } verify方法检测对象role是否为空,如果它不为空才返回true,否则返回false。此时需 要一个实现类一-RoleVerifierImpI,如代码所示。 接口实现类中: @Component public class RoleVerifierImpl implements RoleVerifier { @Override public boolean verify(Role role) { return role != null; } } 同样的,它也是十分简单,仅仅是检测role对象是否为空,那么要引入它就需要改写代码清单5-2-1所示的切面。我们在其RoleAspect类中加入一个新的属性,如代码5-8-2所示: 切面类中: //引入其他类的方法完善接口织面方法第一步:增加被引入对象. /* * @DeclareParents标签说明: * value="值",表示对值所指定的类做功能增强,也就是在值所在的类中增加当前接口的方法接口。 * defaultImpl指定默认的实现类。 */ @DeclareParents(value="Spring11_3_SpringAOP_注解方式.service.impl.RoleServiceImpl+", defaultImpl=RoleVerifierImpl.class) private RoleVerifier roleVerifier; 注解@DeclareParents的使用如代码5-8-2所示,这里讨论它的配置。 Ø value="com.ssm.chapterll.aop.service.impl.RoleServicelmpl+": 表示对RoleServicelmpl类进行增强,也就是在RoleServicelmpl中引入一个新的接口,引入使用了@DeclareParents标签的接口。 Ø defaultlmpl:代表其默认的实现类,这里是RoleVerifierlmpl。 然后就可以使用这个方法了,现在要在打印角色(printRole)方法之前先检测角色是否为空,于是便可以得到代码5-8-3的方法。 测试代码: private static void testAspectInterfaceEnhancements() { ApplicationContext applicationContext = new ClassPathXmlApplicationContext("Spring11_3_SpringAOP_注解方式/applicationContext.xml"); RoleService roleService = (RoleService) applicationContext.getBean("roleServiceImpl"); //注意这里是将roleService接口直接转换成roleVerifier接口 RoleVerifier roleVerifier = (RoleVerifier)roleService; Role role = (Role) applicationContext.getBean("role"); if(roleVerifier.verify(role)){ roleService.printRole(role); } }
Spring_Xml方式
<aop:declare-parents types-matching="Spring11_3_SpringAOP_xml方式 .service.impl.RoleServiceImpl+" implement-interface="Spring11_3_SpringAOP_xml方式 .service.RoleVerifier" default-impl="Spring11_3_SpringAOP_xml方式 .service.impl.RoleVerifierImpl" />
Spring_Xml方式
<!-- 定义Role对象 --> <bean id="role" class="Spring11_3_SpringAOP_xml方式.POJO.Role"> <property name="id" value="1"/> <property name="roleName" value="role_name_1_xml"/> <property name="note" value="role_note_1_xml"/> </bean> <!-- xml方式实现Spring AOP第一步:定义被代理类 --> <bean id="roleService" class="Spring11_3_SpringAOP_xml方式.service.impl.RoleServiceImpl"/> <!-- xml方式实现Spring AOP第二步:定义织面类(代理类) --> <bean id="roleAspectXML" class="Spring11_3_SpringAOP_xml方式.aspect.RoleAspect_xml"/> <!-- xml方式实现Spring AOP第三步:配置Spring AOP执行环境,aop总配置根节点 --> <aop:config> <!-- aop:aspect引用织面,表示当前的Spring AOP的织面环境在ref属性指定的类中,当前指定的是id为roleAspectXML的类 --> <aop:aspect ref="roleAspectXML"> <!-- aop:before:配置前置通知,当系统调用了pointcut属性中表达式指定的方法时,启用前置通知,调用method属性指定的前置通知方法,该方法肯定是aop:aspect标签ref属性指定的织面类中的前置通知方法。 pointcut :定义切入点,当系统调用了切入点方法时,启用前置通知。 method :定义前置通知执行的方法,方法当然是织面中的方法,也就是aop:aspect标签中ref属性指定的织面中的前置通知方法。--> <aop:before method="before" pointcut="execution(public void Spring11_3_SpringAOP_xml方式.service.impl.RoleServiceImpl.printRole(..))"/> <aop:after method="after" pointcut="execution(public void Spring11_3_SpringAOP_xml方式.service.impl.RoleServiceImpl.printRole(..))"/> <aop:after-returning method="afterReturning" pointcut="execution(public void Spring11_3_SpringAOP_xml方式.service.impl.RoleServiceImpl.printRole(..))"/> <aop:after-throwing method="afterThrowing" pointcut="execution(public void Spring11_3_SpringAOP_xml方式.service.impl.RoleServiceImpl.printRole(..))"/> </aop:aspect> </aop:config>
<!-- 定义Role对象 --> <bean id="role" class="Spring11_3_SpringAOP_xml方式.POJO.Role"> <property name="id" value="1"/> <property name="roleName" value="role_name_1_xml"/> <property name="note" value="role_note_1_xml"/> </bean> <!-- 定义被代理类 --> <bean id="roleService" class="Spring11_3_SpringAOP_xml方式.service.impl.RoleServiceImpl"/> <!-- 定义织面类,代理类 --> <bean id="roleAspectXML" class="Spring11_3_SpringAOP_xml方式.aspect.RoleAspect_xml"/> <aop:config> <!-- 引用织面 --> <aop:aspect ref="roleAspectXML"> <aop:pointcut expression="execution(public void Spring11_3_SpringAOP_xml方式.service.impl.RoleServiceImpl.printRole(..))" id="printRole"/> <!-- 传递参数的写法,与注解方式的区别是在连接参数的表达式时,xml方式是使用and连接,而注解方式是使用&&连接 --> <aop:pointcut expression="execution(public void Spring11_3_SpringAOP_xml方式.service.impl.RoleServiceImpl.printRole(..)) and args(role)" id="printRoleParam"/> <aop:before method="before" pointcut-ref="printRole"/> <!-- 注意,织面中的方法尽量不要重载,比如这里的printRole和printRoleParam定义的切入点,虽然printRoleParam传递了role参数,method指定的是before,如果织面中有两个重载的方法before()和before(Role role),还是会去找没有参数的那个before方法,但是又传递了参数,程序就会报错,解决办法就是方法尽量不要重名 --> <!-- <aop:before method="beforeRole" pointcut-ref="printRoleParam"/> --> <aop:after method="after" pointcut-ref="printRole"/> <aop:after-returning method="afterReturning" pointcut-ref="printRole"/> <aop:after-throwing method="afterThrowing" pointcut-ref="printRole"/> <!-- 环绕通知 --> <aop:around method="around" pointcut-ref="printRole"/> </aop:aspect> </aop:config>
多个切面如何处理切面拦截的顺序
默认是按照切面的名称排序
按照指定顺序拦截解决办法
切面类上使用@Order注解
@Order(3) public class Aspect1 {......}
重写Ordered接口,实现getOrder方法
public class Aspect1 implements Ordered{ 其他织面方法与上面的织面类中一致。 //Spring AOP织面的拦截顺序会按照当前方法的返回值顺序执行。 @Override public int getOrder() { return 3; } }
Spring_xml方式
<!-- 引用织面1,并通过order属性指定执行顺序 --> <aop:aspect ref="aspect1" order="3">...</aop:aspect> <!-- 引用织面2 ,并通过order属性指定执行顺序--> <aop:aspect ref="aspect2" order="2">...</aop:aspect>
before是按照order指定的顺序,after则按照逆序
Aspect1......before Aspect2......before Aspect3......before test multi aspect...... Aspect3......after Aspect3......afterReturning Aspect2......after Aspect2......afterReturning Aspect1......after Aspect1......afterReturning
注意:如果被代理类不是有srping管理的,而是new出来的对象,该实例没有经过spring管理就不会增加切面,对应的切面类和切面代码也不会附加在这个实例上,结果就不会给这个实例形成切面编程的效果
Spring IOC
核心接口
BeanFactory接口:是Spring IOC容器的最底层接口,定义了一些基本的方法; ApplicationContext接口:是BeanFactory的子接口之一,但是功能上做了很多扩展,能够应付绝大多数应用场景,可以说是BeanFactory的高级接口,最常用的接口,一般是在ApplicationContext的基础上再进行扩展。
public interface BeanFactory { String FACTORY_BEAN_PREFIX = ”&”; Object getBean(String name) throws BeansException; <T> T getBean(Class<T> requiredType) throws BeansException ; Object getBean(String name, Object...args) throws BeansException; <T> T getBean(Class<T> requiredType, Object...args) throws BeansException; boolean containsBean(String name); boolean isSingleton(String name) throws NoSuchBeanDefinitionException; boolean isPrototype(String name) throws NoSuchBeanDefinitionException; boolean isTypeMatch(String name, ResolvableType typeToMatch) throws NoSuchBeanDefinitionException; boolean isTypeMatch(String name, Class<?> typeToMatch) throws NoSuchBeanDefinitionException; Class<?> getType(String name) throws NoSuchBeanDefinitionException; String[] getAliases(String name); }
Bean 的初始化过程分为 3 步 做完了这 3 步, Bean 就在 Spring IoC 容器中得到了初始化,但是没有完成依赖注入,也就是没有注入其配置的资源给 Bean,那么它还不能完全使用
1. Resource 定位,就是指定Spring的配置文件,需要解析它构建容器,这步是 Spring IoC 容器根据开发者的配置,进行资源定位,在 Spring的开发中,通过 XML 或者注解都是十分常见的方式,定位的内容是由开发者所提供的 。 2. BeanDefinition的载入,解析并定义bean对象。这个过程就是Spring根据开发者的配置获取对应的 POJO,用以生成对应实例的过程。 3. BeanDefinition的注册,这个步骤就相当于把之前通过BeanDefinition载入的POJO往Spring IoC容器中注册,注意,此时仍旧没有对应的bean对象的实例创建。
Bean 的依赖注入过程
对于依赖注入, Spring Bean还有一个配置选项一一lazy-init, 其含义就是是否初始化 Spring Bean。在没有任何配置的情况下,它的默认值为 default,实际值为 false,也就是 Spring IoC 默认会自动初始化 Bean。如果将其设置为 true,那么只有当我们使用 Spring IoC 容器的 getBean 方法获取它时,它才会进行初始化, 完成依赖注入。 所以Spring Ioc容器默认的是非延迟依赖注入的方式,只要容器一旦初始化,初始化bean对象后会立马维护依赖关系,那么就可以直接使用对象实例。
各对象之间的关系比喻
1. Spring IoC容器:餐馆(服务员) 2. BeanDefinitionRegistry和 BeanFactory:菜谱 3. BeanDefinitionRegistry:抽象出来的,向菜谱里注册菜(的管理器) 4. BeanFactory:抽象出来的,管理这些菜谱(的管理器) 5. BeanDefinition:原料(做菜所需要的原料) 6. DefaultListableBeanFactory:具体实施者(具体注册菜谱、做菜的实施者) 7. 依赖注入的使用者:客户(进店吃饭的人)
Spring Bean的生命周期

l 如果Bean实现了接口BeanNameAware的setBeanName方法,那么它就会调用这个方法 。 l 如果Bean实现了接口BeanFactoryAware的setBeanFactory方法,那么它就会调用这个方法 。 l 如果Bean实现了接口ApplicationContextAware的setApplicationContext方法,且Spring IoC容器也必须是一个ApplicationContext接口的实现类,那么才会调用这个方法,否则是不调用的 。 l 如果Bean实现了接口BeanPostProcessor的postProcessBeforelnitialization方法,那么它就会调用这个方法 。 l 如果Bean实现了接口BeanFactoryPostProcessor的afterPropertiesSet方法,那么它就会调用这个方法。 l 如果Bean自定义了初始化方法,它就会调用己定义的初始化方法。 l 如果Bean实现了接口BeanPostProcessor的postProcessAfterlnitialization()方法,完成了这些调用,这个时候Bean就完成了初始化,那么Bean就生存在Spring IoC的容器中了,使用者就可以从中获取Bean的服务。 当服务器正常关闭,或者遇到其他关闭Spring IoC容器的事件,它就会调用对应的方法完成Bean的销毁,其步骤如下 : l 如果Bean实现了接口DisposableBean的destroy方法,那么就会调用它。 l 如果定义了自定义销毁方法,那么就会调用它。
上述生命周期的接口,大部分是针对单个Bean而言的: BeanPostProcessor接口则是针对所有Bean而言的;接口 DisposableBean则是针对Spring IoC容器本身。当一个Bean实现了上述的接口,我们只需要在Spring IoC容器中定义它就可以了,Spring IoC容器会自动识别,并且按图中的顺序执行 。
代码演示
实体类中
public class JuiceMaker implements BeanNameAware, BeanFactoryAware, ApplicationContextAware, InitializingBean, DisposableBean { private String beverageShop;// 饮品店 private Source source = null;// 对饮品的描述 getter setter...... public String makeJuice() { String juice = "这是一杯由 " + beverageShop + " 饮品店,提供的 " + source.getSize() + source.getSugar() + source.getFruit() + "."; return juice; } /** * 验证生命周期的方法 */ @Override public void afterPropertiesSet() throws Exception { System.out.println("[" + this.getClass().getSimpleName() + "] 调用 InitializingBean 接口的 afterPropertiesSet 方法 "); } @Override public void setApplicationContext(ApplicationContext arg0) throws BeansException { System.out.println("[" + this.getClass().getSimpleName() + "] 调用 ApplicationContextAware 接口的 setApplicationContext 方法 "); } @Override public void setBeanFactory(BeanFactory arg0) throws BeansException { System.out.println("[" + this.getClass().getSimpleName() + "] 调用BeanFactoryAware接口的setBeanFactory方法"); } @Override public void setBeanName(String arg0) { System.out.println("[" + this.getClass().getSimpleName() + "] 调用BeanFactoryAware接口的setBeanName方法"); } public void init() { System.out.println("[" + this.getClass().getSimpleName() + "] 执行自定义初始化方法"); } public void destory() { System.out.println("[" + this.getClass().getSimpleName() + "] 执行自定义销毁方法"); } @Override public void destroy() throws Exception { System.out.println("[" + this.getClass().getSimpleName() + "] 执行实现DisposableBean接口的销毁方法"); } }
配置文件中
<!-- init-method="init" destroy-method="destory" 通过属性指定当前bean对象的init方法和destory方法,在初始化和被销毁时都是执行当前类的自定义init和destory方法 --> <bean id="juiceMaker" class="Spring9_3_SpringIOC生命周期.POJO.JuiceMaker" init-method="init" destroy-method="destory"> <property name="beverageShop" value="贡茶"/> <property name="source" ref="source"/> </bean>
依赖注入的三种方式
构造器注入(必须要有对应的构造函数)
构造器注入依赖于构造方法实现,而构造方法可以是无参数或者有参数的。在大部分的情况下,我们都是通过类的构造方法类创建类对象,Spring也可以通过反射的方式使用构造方法完成属性注入。 注意:xml文件中使用的构造方法的参数个数与类型必须在类中有明确定义的
缺点:由于这里的参数比较少,所以可读性还是不错的,但是如果参数很多,那么这种构造方法就比较复杂了,这个时候应该考虑 setter 注入
<bean id="roleCons" class="Spring10_1_依赖注入.POJO.Role"> <!-- <constructor-arg name="id" value="1"/>也可以改成<constructor-arg index="0" value="1"/>方式。即可以通过下标指定参数,也可以通过参数名称指定参数 --> <!-- constructor-arg元素用于定义类构造方法的参数,index 用于定义参数的位置,而value 则是设置值,赋值时顺序可变但是一定要存在,通过这样的定义 Spring 便知道使用 Role(String,String)这样的构造方法去创建对象了。 --> <constructor-arg index="0" value="总经理"/> <constructor-arg index="1" value="公司管理者"/> </bean>
Setter注入(必须要有对应属性的set方法)
setter 注入是 Spring 中最主流的注入方式,它利用 Java Bean 规范所定义的 setter 方法来完成注入,灵活且可读性高。它消除了使用构造器注入时出现多个参数的可能性,首先可以把构造方法声明为无参数的,然后使用 setter 注入为其设置对应的值,其实也是通过Java 反射技术得以现实的。 总结:所以采用setter方式注入属性值的过程是 1. 先以无参数构造方法创建对象。 2. 通过属性的setter方法注入属性值。
<!-- 定义Role,通过setter方法注入属性值 --> <bean id="roleSetter" class="Spring10_1_依赖注入.POJO.Role"> <property name="roleName" value="高级工程师"/> <property name="note" value="重要人员"/> </bean>
接口注入
有些时候资源并非来自于自身系统,而是来自于外界,比如数据库连接资源完全可以在Tomcat下配置,然后通过JNDI的形式去获取它,这样数据库连接资源是属于开发工程外的资源,这个时候我们可以采用接口注入的形式来获取它,比如在Tomcat中可以配置数据源
<Context> <!-- name为JNDI名称url是数据库的jdbc连接username用户名password数据库密码 --> <Resource name="jdbc/ssm" auth="Container" type="javax.sql.DataSource" driverClassName="com.mysql.jdbc.Driver" url="jdbc:mysql://localhost:3306/ssm?zeroDateTimeBehavior=convertToNull" username="root" password="123456"/> </Context>
装配Bean的三种方式
1,在XML中显示配置 2,在Java的接口和类中实现配置 3,隐式Bean的发现机制和自动装配原则
1,基于约定(注解配置)优于配置(xml指定的约定规则)的原则,最优先的应该是通过隐式Bean 的发现机制和自动装配的原则。这样的好处是减少程序开发者的决定权,简单又不失灵活。 2,在没有办法使用自动装配原则的情况下应该优先考虑Java接口和类中实现配置(new创建对象的方式),这样的好处是避免XML配置的泛滥,也更为容易。这种场景典型的例子是一个父类有多个子类,比如学生类有两个子类:男学生类和女学生类,通过Spring IoC容器初始化一个学生类,容器将无法知道使用哪个子类去初始化,这个时候可以使用Java的注解配置去指定。 3,在上述方法都无法使用的情况下,那么只能选择XML去配置Spring IoC容器。由于现实工作中常常用到第三方的类库,有些类并不是我们开发的,我们无法修改里面的代码,这个时候就通过XML 的方式配置使用了。 通俗来讲,当配置的类是你自身正在开发的工程,那么应该考虑Java配置为主,而Java配置又分为自动装配和Bean名称配置。在没有歧义的基础上,优先使用自动装配,这样就可以减少大量的XML配置。如果所需配置的类并不是你的工程开发的,那么建议使用XML的方式 。
xml配置装配Bean
xml方式装配基本数据类型值
<!-- 对于一些基本数据结构的对象属性可异直接通过property标签赋值 --> <bean id="roleSimple" class="Spring10_3_自动转配Bean_xml方式.POJO.Role"> <property name="id" value="1"/> <property name="roleName" value="高级工程师"/> <property name="note" value="重要人员"/> </bean>
xml方式装配对象类型和集合类型
集合装载基本数据类型 <bean id="complexAssembly" class="Spring10_3_自动转配Bean_xml方式.POJO.ComplexAssembly"> <property name="id" value="1"/> <!-- List 属性为对应的<list>元素进行装配,然后通过多个<value>元素设值。 --> <property name="stringList"> <list> <value>value_list_1</value> <value>value_list_2</value> <value>value_list_3</value> </list> </property> <!-- Map 属性为对应的<map>元素进行装配,然后通过多个<entry>元素设值,只是 entry包含一个键( key)和一个值( value )的设置。 --> <property name="stringMap"> <map> <entry key="key1" value="value_key_1"/> <entry key="key2" value="value_key_2"/> <entry key="key3" value="value_key_3"/> </map> </property> <!-- Properties 属性,为对应的<properties>元素进行装配,通过多个<property>元素设置,只是 property元素有一个必填属性 key,然后可以设置值。 --> <property name="properties"> <props> <prop key="prop1">value_prop_1</prop> <prop key="prop2">value_prop_2</prop> <prop key="prop3">value_prop_3</prop> </props> </property> <!-- Set属性为对应的<set>元素进行匹配,然后通过多个<value>元素设值 --> <property name="stringSet"> <set> <value>value_set_1</value> <value>value_set_2</value> <value>value_set_3</value> </set> </property> <!-- 对于数组而言,可以使用<array>设值值,然后通过多个value元素设值 --> <property name="stringArray"> <array> <value>array_value_1</value> <value>array_value_2</value> <value>array_value_3</value> </array> </property> </bean>
集合装载对象类型 <bean id="userRoleAssembly" class="Spring10_3_自动转配Bean_xml方式.POJO.UserRoleAssembly"> <property name="id" value="1"/> <property name="roleList"> <list> <ref bean="role1"/> <ref bean="role2"/> </list> </property> <property name="roleUserMap"> <map> <entry key-ref="role1" value-ref="user1"/> <entry key-ref="role2" value-ref="user2"/> </map> </property> <property name="roleSet"> <set> <ref bean="role1"/> <ref bean="role2"/> </set> </property> </bean>
注解方式装配Bean
意义
更多的时候已经不推荐使用xml的方式去装配Bean,更多的时候会考虑使用注解(annotation)的方式去装配Bean,使用注解的方式可以减少xml的配置,注解功能更为强大,它既能实现xml的功能,也提供了自动装配的功能,采用了自动装配后,程序员所需要的做的决断就少了,更加有利于对程序的开发,这就是“约定优于配置”的开发原则。
目前企业所流行的方式是,以注解为主,以 XML 为辅
@Component注解:表示该类由Spring扫描配置到IOC容器中,默认名称是类名首字母小写
@Component public class JuiceMaker{}
自定义BeanName /** * @class_name:Role 1,给实体类增加@Component(value = "role")注解,表示这个类由SpringIOC容器扫描,并创建对象实例,实例的名称就是value给定的值。 2,也可以简写为@Component("role")。 3,或者直接写@Component,对于这样不指定value值,Ioc容器会默认首字母小写的形式作为bean的id。 */ @Component(value = "role") public class Role {}
指定Spring扫描路径
Spring_xml配置中增加扫描的路径
<context:component-scan base-package="Spring10_4_自动转配Bean_注解方式.POJO, Spring10_4_自动转配Bean_注解方式.serviceImpl, Spring10_4_自动转配Bean_注解方式.controller, Spring10_4_自动转配Bean_注解方式.util"/>
注解方式
在需要被扫描的包下创建一个类,在类上增加@ComponentScan注解,默认扫描当前包路径下所有配置了@Component注解的类文件,注意,POJO的包名和它保持一致才能扫描。 Java代码: @ComponentScan Public class PojoConfig{}
@ComponentScan注解
basePackageClasss:采用复数形式,表示可以配置扫描多个类,可以配置一个java类的数组,只要指定了类路径,Spring会根据这里指定的包路径去扫描对应的包和子包,将配置好的Bean装配进Spring IOC容器
单独指定类名的方式: @ComponentScan(basePackageClasses = {Role.class, RoleServiceimpl.class})
basePackages:采用复数,表示可以配置一个java包的数组,Spring会根据这里指定的包路径去扫描对应的包和子包,将配置好的Bean装配进Spring IOC容器
单独指定包名的方式: @ComponentScan(basePackages = {com.ssm.chapter10.annotation.pojo”, ”com.ssm.chapter10.annotation.service”})
混合使用的方式: @ComponentScan(basePackages = {”com.ssm.chapter10.annotation.pojo”, ”com.ssm.chapter10.annotation.service”},basePackageClasses = {Role.class, RoleServiceimpl.class})
需要注意 以下几点 : Ø 这是对扫描包的定义,可以采用任意一个@ComponentScan 去定义,也可以取消代码中的注释。 Ø 如果采用多个@ComponentScan 去定义对应的包,但是每定义一个@ComponentScan, Spring 就会为所定义的类生成一个新的对象 ,也就是所配置的Bean 将会生成多个实例 ,这往往不是我们的需要。就是说不同的配置类上添加@ComponentScan注解指定包,可能包下面的有重复的内容,对于重复扫描的Bean会生成多个实例,这是不需要的。 Ø 对于已定义了basePackages和basePackageClasses的@ComponentScan, Spring会进行专门的区分,也就是说在同一个@ComponentScan中即使重复定义相同的包或者存在其子包定义,也不会造成因同一个Bean的多次扫描,而导致一次配置生成多个对象。就是说当前配置类上添加@ComponentScan注解指定包,可能包下面的有重复的内容,对于重复扫描的Bean会Spring会专门区分,不会对重复扫描的Bean创建多个实例,导致生成多个对象,这样的情况不会发生,而是只会存在一个Bean对线的实例。 基于上述的几点,笔者建议不要采用多个@ComponentScan注解进行配置,因为一旦有重复的包和子包就会产生重复的对象,这往往不是真实的需求。对于basePackage和basePackageClasses的选择问题,basePackages的可读性会更好一些,因此在项目中会优先选择使用它,但是在需要大量重构的工程中,尽量不要使用basePackages定义,因为很多时候重构修改包名需要反复地配置,而IDE不会给你任何的提示。而采用basePackageClasses,当你对包移动的时候,IDE会报错提示,并且可以轻松处理这些错误。
注入基本属性值
/** * @class_name:Role 1,给实体类增加@Component(value = "role")注解,表示这个类由SpringIOC容器扫描,并创建对象实例,实例的名称就是value给定的值。 2,也可以简写为@Component("role")。 3,或者直接写@Component,对于这样不指定value值,Ioc容器会默认首字母小写的形式作为bean的id。 */ @Component(value = "role") public class Role { // 给实体类的属性增加@Value注解,表示这个类的属性有SpringIOC容器扫描,并将指定的value赋值给当前属性。 @Value(value = "1") private Long id; @Value(value = "role_name_1") private String roleName; @Value(value = "role_note_1") private String note; /* 注意 : 如果使用setter方法注入属性值,需要先初始化一个没有任何属性值得对象,那么必须先有一个无参数的构造方法 */ public Role() { super(); } }
注入对象属性值
@Component public class RoleServiceImpl2 implements RoleService2 { @Autowired//按照类型注入一个spring容器的Role对象实例 private Role role; //@Autowired,或者将注解放在属性的setter方法上 public void setRole(Role role) { this.role = role; } }
注入属性值的几种方式
注解@Autowired,按照类型注入
@Autowired // 按照类型注入一个spring容器的Role对象实例 private Role role;
// @Autowired,或者将注解放在属性的setter方法上 public void setRole(Role role) { this.role = role; }
@Autowired和@Qualifier搭配使用,通过指定@Qualifier注解的value属性可按照名称注入
/* * RoleService的实现类有多个对于Spring注入对象的歧义性,通过@Qualifier(value = "roleServiceImpl")的value属性指定一个Spring容器中beanID作为属性注入。 */ @Autowired @Qualifier(value = "roleServiceImpl") private RoleService roleService;
解决注入顺序问题 1,解决首要问题:@Primary注解 2,解决顺序问题:
/* * 此时,RoleService的实现类有多个,怎样让Spring知道这里需要注入的是哪一个呢? * 解决办法一:对于优先需要被注入的实体类上增加@Primary标签,表示当前对象的实例是优先注入到其他对象的属性中,作为属性值的。 * 注意,这种方式只能知道第一个被注入的对象实例是谁,只能解决首要性问题,但是对于选择性问题就无法处理了。 */ @Component @Primary public class RoleServiceImpl3 implements RoleService { @Autowired // 按照类型注意一个spring容器的Role对象实例 private Role role; public Role getRole() { return role; } // @Autowired,或者将注解放在属性的setter方法上 public void setRole(Role role) { this.role = role; } @Override public void printRoleInfo(Role role) { System.out.println("RoleServiceImpl3实现类中的方法:" + role.toString()); } }
@Bean注解:将方法的返回值交由Spring IOC管理,需要的地方直接获取BeanName即可获取对象实例
4个配置项。 Ø name: 是一个字符串数组,允许配置多个BeanName。 Ø autowire:标志是否是一个引用的Bean对象,默认值是Autowire.NO。 Ø initMethod: 自定义初始化方法。 Ø destroyMethod: 自定义销毁方法。
@Bean(name="initJuiceMaker", initMethod="init", destroyMethod = "myDestroy") private JuiceMaker initJuiceMaker() { JuiceMaker juiceMaker = new JuiceMaker(); source = new Source(); source.setFruit("橙汁"); source.setSize("大杯"); source.setSugar("少糖"); juiceMaker.setSource(source); return juiceMaker; }
意义
对于Java而言, 大部分的开发都需要引入第三方的包(jar文件),而且往往并没有这些包的源码 , 这时候将无法为这些包的类加入@Component注解,让它们变为开发环境的Bean。你可 以使用新类扩展(extends)其包内的类, 然后在新类上使用@Component ,但是这样又显得不伦不类。 这个时候Spring给予一个注解@Bean,它可以注解到方法之上,并且将方法返回的对象作为 Spring的Bean,存放在IoC容器中。比如我们需要使用DBCP数据源,这个时候要引入关于它的包,然后可以通过代码装配数据源的Bean。
代码示例
//使用@Bean标签的第二步:在方法上增加@Bean标签,@Bean(name = "dataSource")表示将这个方法的返回值作为一个Spring容器的bean,并通过name属性指定这个bean的id。 @Bean(name = "dataSource") public DataSource getDataSource() { Properties properties = new Properties(); properties.setProperty("driver", "oracle.jdbc.OracleDriver"); properties.setProperty("url", "jdbc:oracle:thin:@127.0.0.1:1521:ORCL"); properties.setProperty("username", "scott"); properties.setProperty("password", "tiger"); javax.sql.DataSource dataSource = null; try { dataSource = BasicDataSourceFactory.createDataSource(properties); } catch (Exception e) {} return dataSource; }
创建Bean的单例与多例
注解方式
@Component @Scope(ConfigurableBeanFactory.SCOPE_PROTOTYPE) public class Role {
xml方式
<!-- scope="singleton"不写的时候,scope默认属性值是singleton,单例模式 --> <bean id="singletestspring" class="com.bean.SingleTestSpring" scope="prototype"></bean>
Spring配置优化及自动装配
自动装配概念 (bean对象里面的属性由spring自动的去注入属性的值,不需要手动通过属性或者是构造方法的形式去注入值) 1,bean对象的数量增加到一定程度,bean之间的依赖关系的维护随之复杂,xml配置文件的字节数越来越庞大,不利于软件整体工程的实施。 2,spring 通过注解配置自动调用set方法实现依赖注入,使xml配置文件显著缩小。
XML 方式实现属性自动装配(注入属性的值)
在配置文件的根节点或每个bean节点,增加 Autowire 属性并赋值,取值包括: byName:按照属性名称自动对应装配,属性名与注入的bean的名字(id属性值)要一致 byType:按照属性类型自动对应装配,属性类型与被注入的bean的类型要一致 No,禁用自动装配
配置文件根节点
<?xml version="1.0" encoding="UTF-8"?> <beans xmlns="http://www.springframework.org/schema/beans" xmlns:xsi="http://www.w3.org/2001/XMLSchema-instance" xmlns:p="http://www.springframework.org/schema/p" xmlns:aop="http://www.springframework.org/schema/aop" xsi:schemaLocation="http://www.springframework.org/schema/beans http://www.springframework.org/schema/beans/spring-beans-3.0.xsd http://www.springframework.org/schema/aop http://www.springframework.org/schema/aop/spring-aop-3.0.xsd" default-autowire="byType">
bean节点
<bean id="classa" class="com.bean.ClassA" autowire="byType"/>
byName 自动装配 按照属性名自动对应装配,被装配的bean的id属性值要与被注入的属性名相同
byType 自动装配(注入的属性的类型必须要与bean标签的class属性一致) :注入属性值的时候,容器里面不能有2个相同类型(指bean标签的class属性值不能用一样)的bean对象,该类型的属性只能有一个,否则会出错。
关系依赖: public class ClassA { // 依赖关系确定 ClassB classb; ClassC classc; ...... }
Spring核心配置文件中: <?xml version="1.0" encoding="UTF-8"?> <beans xmlns="http://www.springframework.org/schema/beans" xmlns:xsi="http://www.w3.org/2001/XMLSchema-instance" xmlns:p="http://www.springframework.org/schema/p" xmlns:aop="http://www.springframework.org/schema/aop" xsi:schemaLocation="http://www.springframework.org/schema/beans http://www.springframework.org/schema/beans/spring-beans-3.0.xsd http://www.springframework.org/schema/aop http://www.springframework.org/schema/aop/spring-aop-3.0.xsd" default-autowire="byName"> default-autowire="byType"> <!-- ClassA的类中依赖于ClassB和ClassC --> <bean id="classA" class="com.bean.ClassA"></bean> <!-- 如果是byName的话,存在依赖关系的bean标签的id属性必须与ClassA类中的属性名称保持一致,类型任意 --> <!-- 如果是byType的话,存在依赖关系的bean标签的class属性必须与ClassA类中属性的类型完全一致,名字任意写 --> <bean id="classb" class="com.bean.ClassB"></bean> <bean id="classc" class="com.bean.ClassC"></bean> </beans>
注解方式实现属性自动装配
/** * 在类的前面加上@component等同于在spring核心配置文件中加上了一个该类的bean标签。默认创建的bean标签的id属性为类名首字母小写。等同于如下bean标签的内容所示: * Spring_xml配置文件中:<bean id="类名的首字母小写" class = "com.bean.ClassA(类的完整路径名)"></bean> */ @Component public class ClassA { // 依赖关系确定 @Autowired // 表示这个属性的实例自动装配,与名字无关,通过类型装配。 ClassB classb; @Resource(name = "classC")//name的值是对应类文件@Component(value = "classC")的value属性的值 ClassC classc; ...... } @Component(value = "classB") // value属性规定bean标签的id属性 public class ClassB { public void b() { System.out.println("ClassB"); } } @Component(value = "classC") public class ClassC { public void c() { System.out.println("ClassC"); } }
映射文件中: <?xml version="1.0" encoding="UTF-8"?> <beans xmlns="http://www.springframework.org/schema/beans" xmlns:xsi="http://www.w3.org/2001/XMLSchema-instance" xmlns:p="http://www.springframework.org/schema/p" xmlns:aop="http://www.springframework.org/schema/aop" xmlns:context="http://www.springframework.org/schema/context" xsi:schemaLocation="http://www.springframework.org/schema/beans http://www.springframework.org/schema/beans/spring-beans-3.0.xsd http://www.springframework.org/schema/context http://www.springframework.org/schema/context/spring-context-3.0.xsd http://www.springframework.org/schema/aop http://www.springframework.org/schema/aop/spring-aop-3.0.xsd"> <!-- 注解方式实现spring,表示spring会自动扫描 base-package="com.bean"下的所有的类文件中的注解,如果类的注解有@component,spring会自动创建类的实例。--> <!-- 在类的前面加上@component注解,等同于在spring核心配置文件中的一个bean标签 --> <context:component-scan base-package="com.bean"></context:component-scan> </beans>
属性注入标签@Autowired与@Resource对比
@Autowired与@Resource都可以用来装配bean. 都可以写在字段上,或写在setter方法上
@Autowired默认按类型装配(这个注解是属于spring的),默认情况下必须要求依赖对象必须存在,如果没有找到对象注入就会报错,如果要允许null值,可以设置它的required属性为false。
@Autowired(required=false) private BaseDao baseDao;
@Autowired和@Qualifier注解搭配使用,按照名称装配
@Autowired() @Qualifier("baseDao") private BaseDao baseDao;
@Qualifier注解还支持到参数中。
public class RoleController2 { private RoleService roleService; public RoleController2(@Qualifier("roleServiceImpl")RoleService roleService) { super(); this.roleService = roleService; } }
@Resource 是JDK1.6支持的注解,默认按照名称进行装配
名称可以通过name属性进行指定,如果没有指定name属性,当注解写在字段上时,默认取字段名,按照名称查找,如果注解写在setter方法上默认取属性名进行装配。当找不到与名称匹配的bean时才按照类型进行装配。但是需要注意的是,如果name属性一旦指定,就只会按照名称进行装配。
@Resource(name="baseDao") private BaseDao baseDao;
注意:不是所有类型都能自动装配,不能自动装配的数据类型:Object、基本数据类型(Date、CharSequence、Number、URI、URL、Class、int)等
Spring事务
创建事务管理器,并指定管理的SQLSessionFactory
<!-- 配置事务管理,创建spring的事务管理器 --> <bean id="transactionManager" class="org.springframework.orm.hibernate3.HibernateTransactionManager"> <!-- name="sessionFactory"这个值可以提示出来,意味着事务管理器中有这个属性,这里配置的意义在于给Spring事务管理器的sessionFactory注入实体值 --> <property name="sessionFactory" ref="sessionFactory"></property> </bean>
定义事务通知器,表名何时启用事务和事务级别
<!-- 通知事务管理器,决定是否开启事务 --> <tx:advice id="txAdvice" transaction-manager="transactionManager"> <tx:attributes> <!-- name:方法名的匹配格式 --> <!-- propagation:指定事物的传播级别 --> <!-- isolation:指定事物的隔离级别 --> <!-- 指定该事物为只读的,典型的对于只执行查询的事物将该值设置为:true 对于新增 修改 删除 如果设置为只读的 将会报错 --> <!-- no-rollback-for:以逗号分隔的异常类的列表,目标方法可以抛出 这些异常而不会导致通知执行回滚 --> <!-- rollback-for:以逗号分隔的异常类的列表,当目标方法抛出这些 异常时会导致通知执行回滚。默认情况下,该列表为空, 因此不在no-rollback-for列表中的任何运行 时异常都会导致回滚 --> <tx:method name="add*" propagation="REQUIRED" /><!-- propagation="REQUIRED"传播属性 --> <tx:method name="del*" propagation="REQUIRED" /> <tx:method name="upd*" propagation="REQUIRED" /> <tx:method name="*" propagation="SUPPORTS" read-only="true" /> </tx:attributes> </tx:advice>
注解方式: @Transactional(propagation = Propagation.REQUIRES_NEW, isolation = Isolation.READ_COMMITTED) public int insertRole(Role role) {}
指定AOP的切入点触发事务
<!-- 声明切入点(描述service层中表示所有service执行的切入点可以如下定义) --> <aop:config> <!-- 定义切入点的条件,在满足这个条件(* com.service.*.*(..))意思是com.service包下面的所有类的所有方法,切入 --> <aop:pointcut id="servicesPointcut" expression="execution(* com.service.*.*(..))" /> <!--定义通知者,在切入点执行这个类里面的方法,这里是是否开启事务等等。 --> <aop:advisor advice-ref="txAdvice" pointcut-ref="servicesPointcut" /> </aop:config>
事务的特性(ACID)
1.原子性(Atomicity)。事务中所涉及的程序对数据库的修改操作要么全部成功,要么全部失败。 2.一致性(Consistency)。事务执行前和执行后来源和去向保持平衡。 3.隔离性(Isolation)。并发时每个事务是隔离的,相互不影响。 4.持久性(Durubility)。一旦事务成功提交,应该保证数据的完整存在。
Spring中事物的传播级别
PROPAGATION.REQUIRED--支持当前事务,如果当前没有事务,就新建一个事务。这是最常见的选择。 PROPAGATION.SUPPORTS--支持当前事务,如果当前没有事务,就以非事务方式执行。 PROPAGATION.MANDATORY--支持当前事务,如果当前没有事务,就抛出异常。 PROPAGATION.REQUIRES_NEW--新建事务,如果当前存在事务,把当前事务挂起。 PROPAGATION.NOT_SUPPORTED--以非事务方式执行操作,如果当前存在事务,就把当前事务挂起。 PROPAGATION.NEVER--以非事务方式执行,如果当前存在事务,则抛出异常。
Spring中事物的隔离级别
1. 第0种隔离级别:default,使用数据库默认的事务隔离级别,Oracle默认是Read committed 2. 第一种隔离级别:Read uncommitted(读未提交),读,其他事务可读写,写,其他事务能读不能写,解决了更新丢失,但还是可能会出现脏读 如果一个事务已经开始写数据,则另外一个事务不允许同时进行写操作,但允许其他事务读此行数据,该隔离级别可以通过“排他写锁”,但是不排斥读线程实现。这样就避免了更新丢失,却可能出现脏读,也就是说事务B读取到了事务A未提交的数据 3. 第二种隔离级别:Read committed(读提交),读,其他事务可读写,写,其他事务禁止读写,解决了更新丢失和脏读问题 如果是一个读事务(线程),则允许其他事务读写,如果是写事务将会禁止其他事务访问该行数据,该隔离级别避免了脏读,但是可能出现不可重复读。事务A事先读取了数据,事务B紧接着更新了数据,并提交了事务,而事务A再次读取该数据时,数据已经发生了改变。 4. 第三种隔离级别:Repeatable read(可重复读取),读,其他事务不可读写,写,其他事务不可读写;解决了更新丢失、脏读、不可重复读、但是还会出现幻读 可重复读取是指在一个事务内,多次读同一个数据,在这个事务还没结束时,其他事务不能访问该数据(包括了读写),这样就可以在同一个事务内两次读到的数据是一样的,因此称为是可重复读隔离级别,读取数据的事务将会禁止写事务(但允许读事务),写事务则禁止任何其他事务(包括了读写),这样避免了不可重复读和脏读,但是有时可能会出现幻读。(读取数据的事务)可以通过“共享读镜”和“排他写锁”实现。 5. 第四种隔离级别:Serializable(可序化),事务按序列化顺序执行,一个一个执行。解决了更新丢失、脏读、不可重复读、幻读(虚读) 提供严格的事务隔离,它要求事务序列化执行,事务只能一个接着一个地执行,但不能并发执行,如果仅仅通过“行级锁”是无法实现序列化的,必须通过其他机制保证新插入的数据不会被执行查询操作的事务访问到。序列化是最高的事务隔离级别,同时代价也是最高的,性能很低,一般很少使用,在该级别下,事务顺序执行,不仅可以避免脏读、不可重复读,还避免了幻读
整合Mybatis过程:在启动项目时,需要将Mybatis的一些关键类交给Spring创建,比如SqlSessionFactory等。
配置SqlSessionFactoryBean:Spring提供该类去支持SqlSessionFactory的创建与配置,Spring自身提供了SqlSessionTemplate,与SqlSessionFactory一直,但是SqlSessionTemplate支持设置sql执行器类型,SqlSessionTemplate的优先级大于SqlSessionFactory
Spring配置文件中: <bean id="SqlSessionFactory" class="org.mybatis.spring.SqlSessionFactoryBean"> <!-- 引入数据源 --> <property name="dataSource" ref="dataSource"/> <!-- 引入Mybatis配置文件 --> <property name="configLocation" value="classpath:Spring12_Spring与数据库编程/chapter_4_Mybatis与Spring整合/mybatis-config.xml"/> </bean>
配置MypperFactoryBean:Mybatis的映射器有Mybatis体系创建的动态代理对象运行的,但是Spring没有办法为其生成实现类,因此提供MapperFactoryBean类作为中介,得到我们想要的映射器
指定接口方式:通过
<bean id="roleMapper" class="org.mybatis.spring.mapper.MapperFactoryBean "> <!-- mapperInterface是映射器的接口,RoleMapper接口将被扫描为Mapper --> <property name="mapperlnterface" value="com.ssm.chapterl2.mapper.RoleMapper"/> <property name="SqlSessionFactory" ref="SqlSessionFactory"/> <!-- 如果同时注入sqlSessionTemplate和SqlSessionFactory,则只会启用sqlSessionTemplate --> <!-- <property name="sqlSessionTemplate"ref="sqlSessionTemplate"/> --> </bean>
扫描方式:由于单个的指定方式比较费时,且不易于后期的改动,采取扫描包的形势获取映射器
扫描+@Repository注解方式 <bean class="org.mybatis.spring.mapper.MapperScannerConfigurer"> <!-- 指定扫描的路径,扫描到annotationClass指定的注解的接口将作为Mapper映射器注入到Spring IOC容器中 --> <property name="basePackage" value="Spring12_Spring与数据库编程.chapter_4_Mybatis与Spring整合.mapper"/> <!-- 指定一个sqlSessionFactory,稍后会用来创建Sqlsession,和Mybatis一样,获取到Mapper和Sqlsession之后就能执行sql --> <property name="sqlSessionFactory" ref="SqlSessionFactory"/> <!-- 表示basePackage路径下,@Repository注解的接口被Spring加载为映射器 --> <property name="annotationClass" value="org.springframework.stereotype.Repository"/> </bean>
扫描+markerlnterface接口方式 定义扩展接口:public interface BaseMapper {}它没有任何逻辑只是为了标记用 定义映射器接口,必须继承扩展接口:public interface RoleMapper extends BaseMapper {接口方法......} 配置文件中:配置MapperScannerConfigurer类的markInterface属性为扩展接口,所有继承了扩展接口的接口都将被作为映射器由Spring管理 <bean class="org.mybatis.spring.mapper.MapperScannerConfigurer"> <!-- 指定扫描的路径,扫描到annotationClass指定的标签的类将作为Mapper注入到Spring IOC容器中 --> <property name="basePackage" value="Spring12_Spring与数据库编程.chapter_4_Mybatis与Spring整合.mapper"/> <!-- 指定一个sqlSessionFactory,稍后会用来创建Sqlsession,和Mybatis一样,获取到Mapper和Sqlsession之后就能执行sql --> <property name="sqlSessionFactory" ref="SqlSessionFactory"/> <property name="markInterface" value="Spring12_Spring与数据库编程.chapter_4_Mybatis与Spring整合.mapper.BaseMapper"/> </bean>